Two Factor Authentication for iCloud
To begin, open up System Preferences | iCloud. In the resulting window, click Account Details and (when prompted) enter the password for your Apple account (not the password for your macOS device). Click the Security tab and then click Turn On Two-Factor Authentication (Figure A).

Figure A
Enabling two-factor authentication.
In the resulting window (Figure B), you will be prompted to enter a valid phone number and then select Text message under the verification section.

Figure B
Adding the phone number to be used for two-factor authentication.
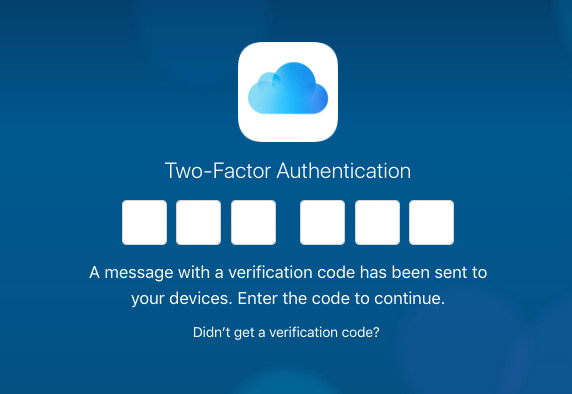
A text will be sent, to the number you configured, that includes a six-digit authorization code. A new popup will also appear (Figure C), that requires you enter that six-digit code.

Figure C
Ready for your six-digit code.
Retrieve the six-digit code from your phone, type it in the popup window on your macOS device, and click Continue.
That’s all there is to it. Now, when you attempt to log into iCloud, you will be prompted for a new two-factor authentication code (Figure D) that will be sent (as a text message) to the phone number you configured within iCloud Settings.

Figure D
Logging into iCloud now prompts you for the two-factor code.
And that’s all there is to setting up two-factor authentication, such that you can use it with your smartphone of choice.